Tips for DIY Floor Planning
If you’re moving, an accurate floor plan is an essential planning tool. While there are plenty of online options for floor planning software, the time it takes to learn them can be longer than doing it the old-fashioned way! Our colleague and floor planner extraordinaire Shannon Graham Cornell of Your Planned Home offers these pro tips for how to create a DIY floor plan for moving.
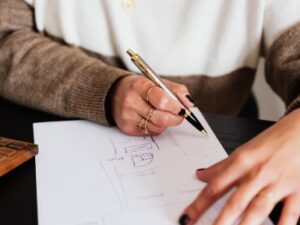
Paper Cutouts and Graph Paper Method
The most basic way to do floor planning yourself is paper-doll style: use graph paper to draw out your rooms and make paper cut-outs of your furnishings. This allows you to not only get a sense of scale and what a layout might look like, but you have ultimate flexibility in trying different options for the room. It’s much easier than moving real pieces of furniture!

Pro Tips for Choosing and Using Graph Paper
Using 1/2 inch graph paper is probably your best bet, and it’s easy to find in most office supply stores. One box on the paper represents one foot in real life, and the scale of your drawings and cut-outs will be a reasonable size to work with.
You can also use ¼ inch graph paper, but your rooms and furniture cut-outs will just be smaller and require a little more dexterity to draw, cut out and maneuver. But no matter what size paper you use, just be sure that you’re using the exact same scale of paper to make both your room drawings and your furniture shapes!
Don’t head to the graph paper first, though. Start by putting together a list of furniture and their measurements and by sketching the shape of your room on plain paper and filling in the room measurements. Once you’ve done those things, transferring your work to the graph paper becomes easier.

Pro Tips for Measuring Furniture

- Measure the height, width, and depth (also called the length) of each piece of furniture you are considering for the room. Use a sturdy tape measure for this if you have one; it’ll make getting those longer measurements a little easier. Or enlist a friend to help.
- Be sure you capture the largest measurement for a particular dimension. Most furniture pieces are not square boxes. They have elements that stick out and make the furniture larger than you might think. Look for feet and decorative trims that can add width or length to a piece; include those extra bits in your numbers.
- Chairs are the hardest items to measure accurately, particularly their depth. PRO TIP: If you can move the chair so its back is against the wall, you can cheat by measuring from the wall to the front edge of the seat to get your chair depth. And don’t forget about measuring the space taken up by recliners (both the reclining back and the footstool).
- Don’t worry about getting your measurements accurate down to a fraction of an inch. When doing your measurements, round up to the nearest inch. Always round UP with furniture. You want the “worst case.” Rounding down = wishful thinking!
Pro Tips for Drawing the Room
- You definitely want a sturdy tape measure to do your room measurements. A laser measurer is a huge bonus if you have one.
- Start by sketching the shape of the room on a plain sheet of paper, and then add your overall measurements, which are the length and width of the room as a whole. If your room is rectangular, you’ll have two overall measurements. If your room is L-shaped, you’ll have four.
- Note where all the doors, windows, and closets are in the room, and note those on your sketch.
- Start at one corner of the room and measure the wall segments. For example, for a wall with one central window, you will have a measurement from the corner to the window opening, a measurement for the window opening, and a measurement from the other edge of the window opening to the opposite corner. Go all the way around the room until you have measurements for all the wall segments. Ignore any window or door trim or sills as you are measuring.
- Make note of the locations of outlets, light switches, etc. on your sketch. You don’t need to measure these; eyeballing is usually good enough unless you are trying to do some very precise furniture placements.
- If your room has window sills, window heights, trim, moulding, etc. that might affect how you place furniture, take measurements of those as well. Knowing that your trim reduces open wall space by 2 inches or the sill is 4 inches wider than the window opening can be helpful when it comes to placing furniture.
- While you rounded your measurements up to the nearest inch when you measured your furniture, round DOWN when measuring your walls.
Pro Tips for Furniture Placement
- Start with the most important piece of furniture in the room (e.g., the bed in a bedroom or the sofa in the living room) and place that first. Add other pieces around it.
- Think about how you will be using that room and give yourself the pieces of furniture you need to support that use. Late-night movie watching in the living room? You need comfortable seating, a place to put your feet (maybe with storage for a blanket or two), and end tables for your drinks/popcorn. Grandma’s uncomfortable antique chair that you just can’t part with because it’s a “family piece”? Add it only if there is space left over. If at all possible, choose function over sentiment. You can always look for a corner in another room for Grandma’s chair.
- If you are deciding between a piece that has storage and a piece that doesn’t, take the one with storage. ALWAYS.
- Consult best practice resources to determine how much space to leave between pieces. The Internet is great for this. A search for “furniture spacing guidelines” will give you a lot of options, such as Kelsey Lee Interiors or Apartment Therapy.